Every technique, dilution ratio, pad color, coat count, and professional spec — written by the Advantage Cleaning who offers both commercial cleaning services as well as specialized Floor Strip & Wax Services in New York City every week for more than a decade.
1. What Is Strip and Wax — and Why Does It Matter?
Strip and wax is a two-stage floor restoration process used on commercial hard floors. Stripping removes old wax, floor finish, dirt, and contamination that has built up over months of regular cleaning. Waxing (more accurately: applying floor finish) lays down fresh protective coats that restore appearance, protect the floor surface, and maintain slip resistance.
Wax vs floor finish — what’s the difference?
Commercial floors don’t use traditional wax anymore. Modern products are polymer-based floor finishes harder, more durable, and easier to maintain. The term “wax” has stuck, but the product in the bucket is a floor finish or floor coating. This guide uses both terms interchangeably as the industry does.
A well-executed strip and wax programme does three things that daily mopping cannot: it removes embedded contamination from previous finish layers, establishes a clean mechanical bond for new finish, and restores the floor’s ability to be maintained effectively. Without periodic stripping, finish layers accumulate, yellow, and eventually peel — at which point the repair is significantly more expensive than the maintenance would have been.
Strip / Wax Examples
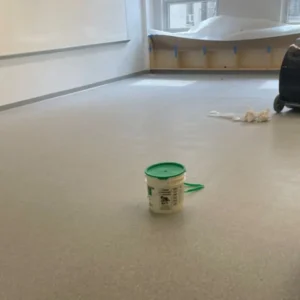
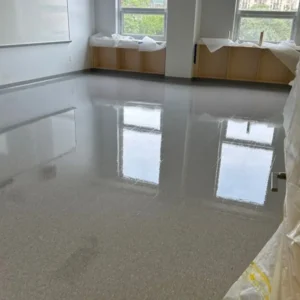

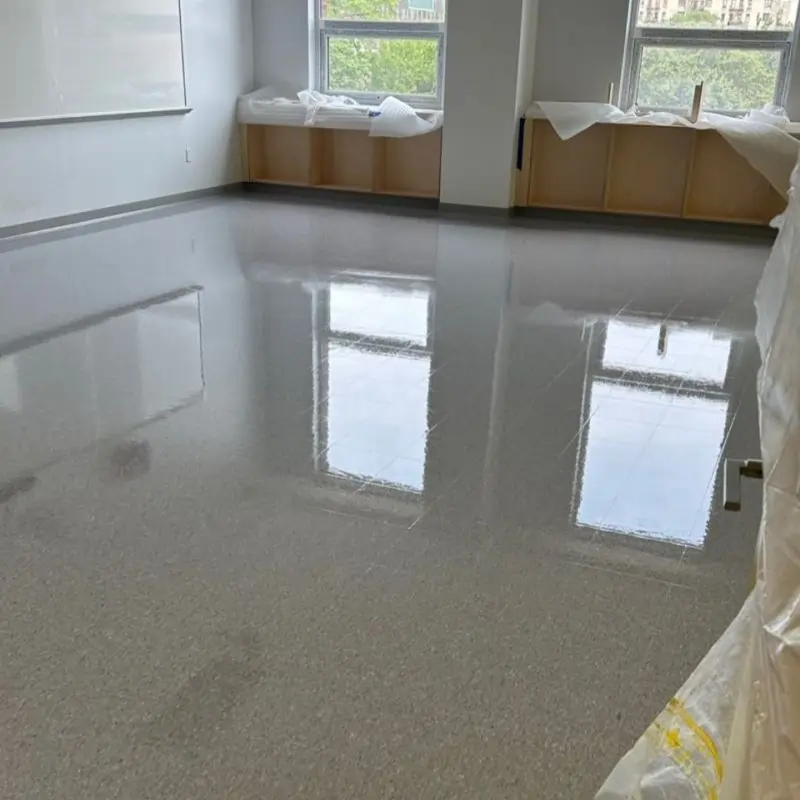
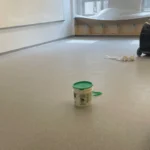
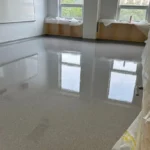
Before / After


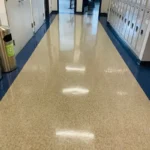
Before / After
OSHA compliance note:
29 CFR 1910.22 requires maintained walking-working surfaces in commercial facilities. Proper floor finish maintenance is part of that compliance requirement. Every strip and wax service should be logged with date, areas covered, and supervisor sign-off.
2. Is Your Floor Type Compatible?
Strip and wax is not appropriate for every floor. Using the wrong chemistry on the wrong surface causes permanent damage. Identify your floor type before touching any equipment.
Vinyl Composition Tile (VCT) is the most common commercial floor type and the primary candidate for strip and wax. It is designed for this process. Without regular strip and was cycles, VCT yellows and becomes increasingly difficult to maintain.
Stripping
- Heavy-duty alkaline stripper
- Coarse or very coarse stripping pad
- Dwell time: 5-10 minutes
Sealing
- 1-2 sealer coats
- Apply with microfiber mop
- Dry time: 30-45 minutes
Finishing
- 3-7 coats depending on traffic
- High-solids finish
- Burnish between coats for clarity
- Strip 1-2 times per year
3. Equipment You Need
Using the right equipment is not optional. The wrong pad grit, wrong machine speed, or wrong mop type produces poor results and can damage the floor.
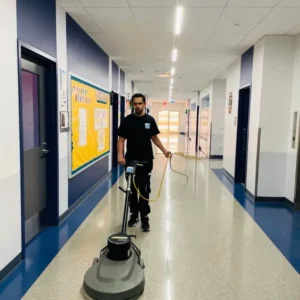
Auto-Scrubber
Large-area stripping + scrubbing
Walk-behind or ride-on auto-scrubber with stripping solution in the tank. Ideal for areas over 2,000 sq ft. Applies solution, scrubs, and picks up slurry in one pass — significantly faster than a swing machine on large open areas.
When to use: Large open areas (warehouses, school corridors, office floors). Use aggressive (black) pads under the scrubber deck.
Wet Vacuum (Wet/Dry Vac)
Slurry pickup
Used to pick up stripping solution and emulsified wax slurry. Do not let slurry dry — it re-deposits contamination. Commercial wet vacs with wide-mouth squeegee attachments cover floor area fastest.
Critical:** Never use a standard vacuum. Wet slurry destroys dry vacuum motors.
Microfibre Finish Mop
Applying floor finish
Dedicated microfibre mop used only for finish application — never used for cleaning. Any contamination in the mop head shows up as streaks, bubbles, or contaminated coats. Keep finish mops sealed in plastic between coats.
Rule: Separate mop for every coat. Never use a cotton mop for finish — lint contamination is irreversible until re-stripped.
4. Chemicals and Dilution Ratios
Always read the Safety Data Sheet (SDS) for every product.
Dilution ratios vary by brand — the ratios below are general commercial standards. Never mix stripping chemicals with other cleaners. Strippers are high-pH (alkaline); mixing with acids produces dangerous reactions.
Floor Finish Selection Guide
| Finish Type | Solids Content | Best For | Burnishable? |
|---|---|---|---|
| Standard Finish | 18–22% | Low-medium traffic offices, retail | Yes — at 1,000 RPM |
| High-Solids Finish | 25–30% | Schools, medical offices, high-traffic corridors | Yes — at 1,500 RPM |
| Ultra High-Solids | 30%+ | Warehouses, distribution centres, 24/7 operations | Yes — at 2,000+ RPM |
| Matte Finish | 18–22% | Healthcare, areas where gloss is unwanted | Limited |
5. Step-by-Step Process
Clear all furniture and movable fixtures. Place wet floor signs at every entrance. Ensure adequate ventilation — open windows and doors, run exhaust fans. Check that floor drains are clear. Pre-sweep or dust-mop the entire floor before applying any stripper.
- Wet floor signs go up before any product touches the floor — not after
- Protect walls with masking tape or cardboard — stripper splatter stains
- Move baseboards if they will be painted — stripping chemicals cause staining
Mix stripper and cold water at the correct ratio for your soil level (see dilution table above). Use cold water — hot water causes excessive foaming and reduces contact time. Mix only what you can apply in 15–20 minutes.
- Always add concentrate to water — not water to concentrate — to minimise foaming
- Label the bucket clearly and keep it away from finish buckets
- Test on a small inconspicuous area if using a new product
Apply stripper to a section small enough to machine-scrub before it dries — typically 200–400 sq ft at a time. Apply with a mop, working away from the door. Apply generously but do not flood the floor — puddles slow penetration.
- Work furthest point from exit first — never mop yourself into a corner
- Low-angle mop application reduces splashing on walls
- In warm rooms (above 25°C), reduce section size — stripper dries faster
Allow the stripper to dwell for the time specified for your soil level. Then scrub with the floor machine using a black stripping pad. Work in overlapping passes. The old finish should emulsify into a grey or brown slurry — this is correct.
- Work edges and corners first with a hand pad, then machine the open area
- Do not let slurry dry — move to Step 5 immediately after scrubbing each section
- If the slurry is clear, the stripper may be too dilute — increase concentration
Wet vacuum the emulsified slurry immediately after scrubbing each section. Do not let it sit. If the slurry dries, it re-deposits dissolved wax — a thin contamination layer that prevents proper finish adhesion.
- Empty the wet vac tank frequently — full tanks reduce suction and leave residue
- Double-pass doorways and high-traffic paths to ensure full pickup
After all slurry is removed, neutralise with a pH-neutral rinse (clean water or purpose-made neutraliser at low dilution). Mop the entire floor, then wet-vac the rinse water. The floor must read pH 7–8 before finish is applied.
- Use pH test strips — floor should read 7–8 before proceeding
- A properly stripped VCT floor should squeak underfoot — no slip, no residue
- If floor feels slippery after rinsing, residual wax remains — strip again
The floor must be completely dry before applying sealer or finish. Minimum 1 hour at standard temperature and airflow. Apply 1–2 coats of sealer using a clean microfibre mop. Allow 30–45 minutes between coats.
- Test dryness: press back of hand to floor — no cool sensation means dry
- Applying finish to a damp floor causes white clouding or adhesion failure
- Apply sealer in thin, even coats — thick coats cause streaking
Apply finish coats one at a time, allowing 30–45 minutes between each coat. Apply each coat perpendicular to the previous coat to avoid visible lap marks. Allow the final coat to cure fully — minimum 8 hours before light foot traffic, 24 hours before heavy traffic or furniture replacement.
- Thin coats applied in multiple passes produce a harder, clearer surface than fewer thick coats
- Check each coat at a raking angle from the doorway before applying the next
- Final coat: burnish with high-speed burnisher for maximum gloss and surface hardness
- Document date, product, dilution, coats applied, and sq footage for compliance records
6. How Many Coats? (By Facility Type)
Coat count is not a universal number — it depends on the floor’s traffic level, the finish’s solids content, and whether you are starting from bare floor or maintaining an existing programme.
| Facility Type | Coats | Finish Type | Strip Frequency | Burnish Programme |
|---|---|---|---|---|
| Small private office | 3 | Standard | Every 18–24 months | Quarterly |
| Corporate office (open plan) | 5 | High-solids | Every 12–18 months | Monthly |
| K–12 school classroom | 5 | High-solids | Annually (summer) | Monthly |
| School corridor / cafeteria | 7 | Ultra high-solids | Annually (summer) | Weekly |
| Medical / healthcare facility | 5–7 | High-solids antimicrobial | Every 12 months | Weekly |
| Retail (high foot traffic) | 5 | High-solids | Every 12 months | Monthly |
| Warehouse / distribution | 3–5 | Ultra high-solids | Every 18–24 months | As needed |
7. Common Mistakes — What Goes Wrong and How to Fix It
Most strip and wax failures trace back to one of these ten mistakes. Each one is preventable.
Stripper dissolves the factory wear layer on LVT permanently. On marble and stone, alkaline stripper etches the surface in seconds — the damage is irreversible without mechanical re-honing.
Identify the floor type before buying any product. LVT requires manufacturer-approved finish only. Natural stone requires a specialist stone programme — never standard strip and wax chemistry.
Dried slurry re-deposits dissolved wax back onto the floor as a thin contaminated layer. The floor looks stripped but finish will peel within days due to poor adhesion.
Work in smaller sections. Apply stripper, scrub, and immediately vacuum — never let slurry sit for more than a few minutes after scrubbing. Reduce section size in warm rooms.
Residual alkaline stripper chemically interferes with floor finish — the finish may remain tacky, cloud over, or peel within a week of application.
Always rinse with pH-neutral water after slurry removal. Use pH strips to confirm the floor reads 7–8 before applying any finish. Takes 10 minutes and saves having to redo the entire job.
Moisture trapped under finish causes white clouding or milky patches. On humid days this can affect the entire floor. The clouding often remains visible permanently.
Wait minimum 1 hour after rinsing. Test by pressing the back of your hand to the floor — no cool sensation means dry. Use fans to accelerate drying in humid conditions.
Thick coats dry with lap marks, bubbles, and ridges. They cure more slowly and peel at the edges. A thick coat does not build faster — it just fails faster.
Apply thin, even coats. Finish should be barely visible on the floor as you apply it. If you can hear the mop squeaking in the finish, it’s too thick in that area.
A white or red pad on a heavily coated floor does nothing. A black pad on a freshly finished floor scratches through all the coats you just applied.
Stripping: black or brown. Scrubbing: red or green. Buffing fresh finish: beige. Burnishing fully cured finish: white at high speed. See the pad guide above.
Dust, debris, or cleaning product residue in a mop head transfers into each coat as streaks or blobs. This often only becomes visible after the floor is walked on.
Dedicated finish mops, sealed in plastic between coats. Rinse and inspect before every coat. If in doubt, use a fresh mop head — they cost less than re-stripping the floor.
Stripper that hasn’t penetrated only removes the surface layer — leaving subsurface contamination that causes peeling or adhesion failure within weeks of re-finishing.
Respect the dwell time for your soil level. Minimum 5 minutes on standard floors, up to 10–15 on heavy build-up. Watch for the finish to visibly soften before scrubbing.
Floor machines cannot reach within 2–4 inches of walls and corners. Wax builds up massively in these areas over time, turning black-yellow and looking dirty even on a freshly waxed floor.
Work all edges and corners with a hand pad before using the machine on the main floor. Use a detail brush for tight corners. Do edges first, centre last.
Fresh finish is soft and scratches easily. Scuff marks appear immediately and are permanent until the surface is re-buffed or re-coated. Furniture placement leaves permanent impressions.
Minimum 8 hours before light foot traffic. 24 hours before heavy traffic or furniture replacement. Mark the area with wet floor signs and schedule the work overnight or over a weekend accordingly.
8. Safety Checklist — Before You Start
Per OSHA 29 CFR 1910.22, floor maintenance creates walking-working surface hazards that require active management. Check all items before beginning.
Pre-Work Safety Checklist
0 / 12 checked9. Should You DIY or Call a Professional?
Answer 5 Questions to Find Out
Select Yes or No for each question — a recommendation will appear.
Should You DIY or Call a Professional?
Answer 5 questions — a recommendation will appear after your third answer.
✓ A Trained Operator Can Handle This
Your facility profile suggests a manageable strip and wax job — smaller area, standard traffic, no complex compliance requirements. With the right equipment, correct dilutions, and attention to the steps in this guide, a trained in-house operator can produce good results. Review the common mistakes section before starting.
⚠ Recommend a Professional Commercial Operator
Your facility has one or more factors — large size, compliance documentation requirements, heavy build-up, or premium surface proximity — that increase the risk significantly. A professional operator with the right equipment, chemistry, and documentation process will produce better results. Request a facility assessment or see our floor care programme.
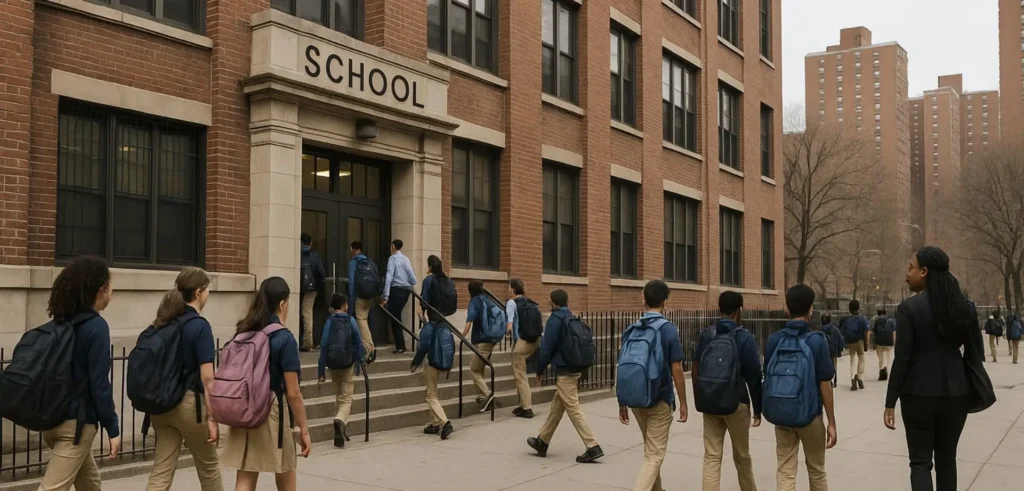
For larger facilities, schools, healthcare environments, and occupied commercial buildings, professional VCT Strip & Wax Services are often the safest and most cost-effective option.
Professional floor Strip & Wax · NYC
Need VCT Floor Strip & Wax Done by a Professional Team?
We provide both professional floor cleaning, as well as commercial strip and wax services across NYC, and Northern New Jersey — with documented quality, supervisor sign-off, and compliance records on every service.
Request a Quote
We will contact you within the hour to start working on your quote.
Your contact information